Lytebox Gallery (With HTML)
Support for Lytebox templates with HTML pages
Support for Lytebox web templates version v3.22a and v3.22. If your template includes a folder named lytebox and one named slide_pages you have this style. See your "lytebox.js" to check the version number.
See Instead…
See Instead…
Setup the first slide
Edit the "slide1-1.jpg" in the "slide_images" folder with your image. Edit the "slide1-1.htm" in the "slide_pages" folder with your text. Open the "slideshow-home.htm" and check the first slide in the first slideshow. For slide #2 edit the 1-2 files.
Slideshow files are numbered by what show they are in and what number slide they are. EXAMPLE: "slide3-4.jpg" and "slide3-4.htm" are for slide #4 in the 3rd slideshow.
Using only images with no HTML pages in the slideshows
You can use the "IMAGE-ONLY-slideshow-home.htm" included in the template download. This will make the lytebox slideshows only display the images in the "slide_images" folder and you can delete the "slide_pages" folder. Optionally, you can edit the links in the "slideshow-home.htm" to not use the HTML pages that are in the "slide_pages" folder.
SLIDESHOW 1, SLIDE 1, EXAMPLE:
<a href="slide_pages/slide1-1.htm" rel="lyteframe[show1]" title="Slideshow One" rev="width: 520px; height: 450px;" class="biglink">
Edit the above link to the following for an image only:
<a href="slide_images/slide1-1.jpg" rel="lytebox[show1]" title="Slideshow One" class="biglink">
Slideshow sizes
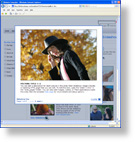
Edit the "slideshow-home.htm" to change the size of each slide. Each slide can be a different size. (not used with images only) Click visual below.

Note: if you're using the Paypal cart "slideshow-home.htm":
If you are using the "slideshow-home.htm" that includes Paypal forms, and are adding more slideshows, be sure to edit the link for the first slide in 2 places. One before the other slides and one after them.
Adding more slides
You can add or remove slides in the slideshows. Edit the "slideshow-home.htm". Click visual below.
In the visual above you will now place an image named "slide1-10.jpg" in the "slide_images" folder. Place a page named "slide1-10.htm" in the "slide_pages" folder. Edit the new "slide1-10.htm" so your new image, "slide1-10.jpg" will display. EXAMPLE: Make a copy of the "slide1-1.htm" edit "slide1-1.jpg" inside this page to "slide1-10.jpg".
Remove a slide
You will delete one line of code as shown in the visual above to remove a slide. EXAMPLE: To remove slide #9 in slideshow #1 remove this line in the "slideshow-home.htm":
<a href="slide_pages/slide1-9.htm" rel="lyteframe[show1]" title="Slideshow One" rev="width: 550px; height: 450px;"></a>
Add another slideshow
You can add as many slideshows as your project requires.
- Copy the code group as shown in the visual above in the "slideshow-home.htm".
- Paste it below itself or in another HTML page.
- Edit the [show?] number. EXAMPLE: In the visual above edit the [show1] to [show7] in 9 places. (be sure to edit the starting slide.)
- Edit the slide numbers in your pasted code. EXAMPLE: Edit 1- in nine places to 7- to add a 7th slideshow.
- Add new images in the "slide_images" folder. EXAMPLE: Add images "slide7-1.jpg" through "slide7-9.jpg".
- Copy "slide?-?.htm" pages in the "slide_pages" folder. EXAMPLE: Make 9 copies of the "slide1-1.htm".
- Rename your new copies "slide7-1.htm" through "slide7-9.htm".
- Edit the image to be displayed in your new copied "slide1-1.htm" pages. In each page edit the "slide1-1.jpg" so the page will display your new image you added to the "slide_images" folder. EXAMPLE: Edit "slide1-1.jpg" to "slide7-1.jpg" your new "slide7-1.htm".
Slideshow options, colors and speeds
You can edit the color themes in the "lytebox.css" (Edit the lytebox.js in non-2009 templates). Open the "lytebox.js" for animation speeds and other options. Edit the color variable in the "lytebox.css" to change colors. This will be line 15:
@import url("lytebox/lytebox-blue.css");
In the above example edit the "blue" to one of the colors listed at the top of the "lytebox.css". If you do not see this line, click here for update info.
See "About the script and more options" below for more details. CSS code can be found in your "coolstyle.css" for the pages in the "slide_pages" folder. Search for "LYTEBOX" to edit this code.
The black theme
The black and darkgreen color themes were added by Allwebco. To change to this theme edit line 15 to black or darkgreen in the "lytebox.css". Then edit the ".slidepages" "background-color:" class in the "coolstyle.css" (not required for images only slideshows).
Margins, padding and borders
If you want more margin (outer border) in the slideshows, edit the "this.borderSize" in the "lytebox.js" and... edit these 2 padding lines in the "lytebox.css".
#lbImageContainer, #lbIframeContainer { padding: 20px; padding-top: 20px; }
#lbDetailsData { padding: 0 20px; }
Note: In most cases, edit the "this.borderSize" in the "lytebox.js" so it is 3 pixels larger than the padding you edit in the "lytebox.css".
Editing with your own custom colors
You can create a custom color theme. For example, edit the "lytebox.css" to "red". In the "lytebox" folder. Then edit the "lytebox-red.css" with your own colors. You can edit the .gif images in the "lytebox" folder that start with "red_" and create your own custom images.
How the files work in tour templates
When you open a slideshow on the "slideshow-home.htm" page an HTML page is layered over the page. This layered page is an IFrame and will be displaying one page at a time from the "slide_pages" folder and one image from the "slide_images" folder. Example: When you click on the first slideshow on the "slideshow-home.htm" the "slide1-1.jpg" in the "slide_images" folder is displayed inside the "slide1-1.htm" from the "slide_pages" folder.
The Lytebox tour template download includes the following:
- "lytebox.css" is the CSS file for lytebox and is edited on line 15 with your color theme.
- "lytebox" folder for the lytebox close, play, pause and next images.
- "lytebox" folder also includes a .css file for each color theme included with the template.
- "lytebox.js" is the script and includes some options you can edit.
- "slide_images" folder includes the images used in the lytebox slideshows.
- "slide_pages" folder includes an HTML page for each slide that you can edit.
- "slideshow-home.htm" to display the Lytebox slideshows.
- CSS code can be found in your "coolstyle.css" for the pages in the "slide_pages" folder. Search for "LYTEBOX" to edit this code.
About the script and more options
Notes about the modifications to the lytebox script made by Allwebco can be found at the top of the "lytebox.css" and the "lytebox.js".
The Lytebox script included in some Allwebco templates is an updated version written by Markus F. Hay. that was originally created by Lokesh Dhakar. For more info and script options see lytebox.com and for the original script see www.lokeshdhakar.com
Related Topics:
Tour Templates